Ensuring the reliability and durability of products is crucial in today's competitive market. One essential method to assess a product's endurance is through temperature humidity chamber tests. These tests simulate various environmental conditions to evaluate how products will perform under extreme temperatures and humidity levels. This blog will walk you through the process of conducting these tests, helping you understand their importance and how to execute them effectively.
What is a Temperature and Humidity Chamber?
A temperature and humidity chamber is a sophisticated piece of equipment designed to simulate a range of environmental conditions. These chambers can replicate extreme temperatures, from freezing cold to scorching heat, and varying humidity levels, from bone dry to saturated air. By placing products within these controlled environments, manufacturers can predict how their products will behave in real-world conditions, ensuring quality and reliability. The key features of the temperature and humidity chamber are as follows:
|
|
|
|
|
Name: Benchtop Environmental Test Chamber |
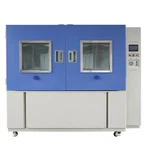
Name: Standing Temperature and Humidity Test Chamber |
Name: Walk-in Temperature and Humidity Test Chamber |
| Volume: 50L/80L | Volume: 100L/225L/500L/800L/1000/L | Volume: >8m³ |


Wide Temperature Range
Temperature and humidity chambers can typically simulate a broad range of temperatures, from as low as -70°C to as high as 150°C. This wide range allows for the testing of materials and products in extreme cold and hot conditions, which is vital for applications such as aerospace and automotive industries, where products may be exposed to harsh environments.
Humidity Control
These chambers are equipped with advanced humidity control systems that can adjust humidity levels from 20% to 98% relative humidity. This feature is particularly important for testing the effects of moisture on products, which can lead to issues such as corrosion, mold growth, and material degradation. Precise humidity control ensures that tests are accurate and reproducible.
Uniformity and Precision
Modern temperature and humidity chambers offer precise control over both temperature and humidity, ensuring uniform conditions throughout the test space. This uniformity is crucial for obtaining consistent and reliable test results. Advanced control systems and sensors continuously monitor and adjust the conditions inside the chamber, maintaining the desired environment with high accuracy.
Understanding the capabilities and features of your temperature and humidity chamber is the first step in conducting effective tests.
How Do You Prepare for a Temperature and Humidity Chamber Test?
Preparation is key to conducting accurate and reliable temperature and humidity tests. Proper preparation ensures that the test conditions are met, samples are correctly positioned, and results are consistent and repeatable. Here's how to get started:
Define Test Parameters
Before starting, it's crucial to define the parameters of your test. This step involves clearly outlining the test objectives, conditions, and duration to ensure the test is tailored to your specific needs.
| Name | Constant Temperature Humidity Chamber | ||||
|
Model |
TH-100 |
TH-225 |
TH-500 |
TH-800 |
TH-1000 |
|
Internal dimension (mm) |
400*500*500 |
500*600*750 |
700*800*900 |
800*1000*1000 |
1000*1000*1000 |
|
Overall dimension (mm) |
860*1050*1620 |
960*1150*1860 |
1180*1350*2010 |
1280*1550*2110 |
1500*1550*2110 |
|
Capacity |
100L |
225L |
500L |
800L |
1000L |
|
Temperature range |
-20℃ ~+150 ℃ |
||||
|
Low type |
A: -40℃ B:-70℃ C -86℃ |
||||
|
Huimidity Range |
20%-98%RH |
||||
|
Temperature deviation |
± 2.0 ℃ |
||||
|
Heating rate |
3 ℃ / min |
||||
|
Cooling rate |
1 ℃ / min |
||||
|
Controller |
Programmable color LCD touch screen controller, Multi-language interface, Ethernet , USB |
||||
|
Exterior material |
Steel Plate with protective coating |
||||
|
Interior material |
SUS304 stainless steel |
||||
|
Standard configuration |
1 Cable hole (Φ 50) with plug; 2 shelves |
||||
- Objective: Determine what you are temperature humidity chamber testing for-whether it's product lifespan, material stability, or resistance to environmental stress. This will help you decide the specific conditions and duration needed for the test. For example, if you are testing for material stability, you might need to expose the product to high humidity levels for an extended period to observe any changes or degradation.
- Conditions: Set the specific temperature and humidity levels you need to test. These conditions should reflect the real-world environments the product is likely to encounter. For instance, if you are testing an automotive component, you might set the temperature to simulate summer heat or winter cold, and adjust the humidity to mimic rainy or humid conditions.
- Duration: Decide how long the test will run. The duration could range from a few hours to several months, depending on the product and the test objective. A short test might be sufficient for initial screening, while long-term testing can reveal how the product behaves over time under continuous or cyclic environmental stress.
|
|
|
|
| Precise Temperature and Humidity Sensors | Cable hole | Precise airflow |


Calibrate the Chamber
Ensure that the temperature and humidity chamber is properly calibrated. Regular calibration guarantees that the chamber provides accurate and consistent conditions, which is vital for reliable test results. Calibration should be done according to the manufacturer's guidelines and industry standards. It typically involves checking the sensors and control systems to ensure they are functioning correctly and making any necessary adjustments. Proper calibration prevents discrepancies in test results and ensures the chamber maintains the set conditions throughout the test duration.
Prepare the Samples
Proper sample preparation is essential for achieving accurate results and reducing the risk of test failures due to setup errors.
- Conditioning: Some products may require pre-conditioning before testing to stabilize them at a certain temperature and humidity. Pre-conditioning helps in eliminating any initial variations in the sample's state, ensuring that the test starts with the sample in a known and consistent condition. For example, electronic components might need to be conditioned at a moderate temperature and humidity before being exposed to extreme conditions.
- Positioning: Place the samples in the chamber in a way that allows for even exposure to the environmental conditions. Avoid overcrowding the chamber to ensure uniform testing. Each sample should have sufficient space around it to allow air to circulate freely, ensuring that temperature and humidity levels are consistent throughout the chamber. Proper positioning helps in obtaining accurate and representative test results for each sample.
- Documentation: Document all aspects of the test preparation, including the sample details, test parameters, and calibration records. This documentation is crucial for traceability, quality control, and repeatability of the tests. It ensures that the test can be replicated under the same conditions if needed and provides a record for analyzing any anomalies or unexpected results.
|
|
 |
| PID controller | Water-Saving Humidification |

Conducting the Test
Once the test parameters are set, the temperature humidity chamber is calibrated, and samples are prepared, you can start the test. Monitor the conditions and samples regularly to ensure the test is proceeding as planned. Any deviations in temperature or humidity should be recorded and corrected to maintain the integrity of the test.
Post-Test Analysis
After the test is completed, carefully remove the samples from the chamber and document their condition. Conduct any necessary post-test analyses, such as visual inspections, measurements, or performance tests, to determine how the samples were affected by the environmental conditions. Compare the results against the initial conditions and the test objectives to draw conclusions about the product's performance and durability.
How Do You Conduct LIB Temperature and Humidity Chamber Test?
With everything prepared, it's time to start the temperature and humidity chamber test. Conducting the test methodically ensures accurate, reliable results and provides valuable insights into the performance and durability of the product under various environmental conditions. Follow these steps for a successful temperature and humidity chamber test:
Set Up the Chamber
Proper setup of the chamber is crucial to ensure that the test conditions are accurately maintained throughout the testing period.
- Input Parameters: Enter the defined test parameters (temperature, humidity, and duration) into the chamber's control system. This involves setting the specific temperature range, humidity levels, and the duration for each phase of the test. Modern chambers often have programmable controllers that allow for complex test cycles to be set up in advance. Ensure that the parameters match the test plan precisely to maintain consistency and repeatability.
- Monitor Conditions: Throughout the test, continuously monitor the conditions inside the chamber to ensure they remain consistent with the set parameters. Regular checks and adjustments may be necessary to maintain the desired environment. Advanced chambers are equipped with sensors and control systems that automatically adjust the conditions to compensate for any deviations. However, manual monitoring is also important to catch any issues early and make necessary corrections.
Observe and Record Data
Accurate observation and data recording are essential for analyzing the product's performance under test conditions.
- Real-Time Monitoring: Use the temperature humidity chamber's monitoring system to observe the product's behavior in real time. This can include visual inspections through a viewing window or using cameras to capture images or video of the product during the test. Real-time monitoring helps in identifying any immediate changes or failures that occur as the test progresses.
- Data Logging: Record all relevant data, including temperature, humidity, and any changes in the product's condition. Many modern chambers come equipped with data logging capabilities for automatic recording, which simplifies data collection and ensures accuracy. Ensure that the data logging system is properly set up to capture all necessary parameters and that it is functioning correctly throughout the test. This data will be crucial for post-test analysis.
Analyze Results
After the test is complete, carefully analyze the data to determine how the product performed under the specified conditions.
- Performance Degradation: Look for any signs of degradation or failure in the product. This can include changes in physical appearance, such as discoloration, warping, or cracking, as well as functional issues like reduced performance or complete failure. Document all observed changes in detail, as these observations will be critical for evaluating the product's durability and identifying potential weaknesses.
- Compare Results: Compare the test results against the product's specifications and performance criteria to assess its reliability. This involves evaluating whether the product maintained its intended function and structural integrity throughout the test. Use the data collected during the test to perform a detailed analysis, including statistical evaluations, to understand the product's behavior under different conditions. This comparison will help in determining whether the product meets industry standards and customer requirements.
Report and Documentation
Prepare a comprehensive report that includes all aspects of the test, from the initial setup to the final analysis. This report should detail the test parameters, observations, data collected, and conclusions drawn from the analysis. Include charts, graphs, and tables to visualize the data and make it easier to understand. Proper documentation is essential for traceability, regulatory compliance, and future reference.
Conclusion
Temperature humidity chamber tests are essential for assessing product durability and reliability in various environmental conditions. By understanding how to prepare for and conduct these tests, you can ensure that your products meet high-quality standards and perform well in real-world conditions.
At LIB Industry, we provide turn-key solutions for environmental testing, including research, design, production, commissioning, delivery, installation, and training.
If you want to learn more about this kind of Temperature Humidity Chamber, welcome to contact us at info@libtestchamber.com.