

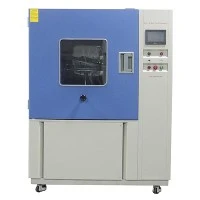

Accelerated aging testing is a crucial process in various industries, allowing manufacturers to predict the long - term performance and reliability of their products in a relatively short period. A temperature chamber, also known as a temp chamber, is an indispensable tool for conducting such tests. As a temp chamber supplier, I am here to share with you how to effectively use a temp chamber for accelerated aging testing.
Understanding the Basics of Accelerated Aging Testing
Accelerated aging testing aims to simulate the effects of long - term environmental exposure on a product in a shorter time frame. By subjecting the product to extreme conditions such as high or low temperatures, humidity, and other environmental factors, we can accelerate the degradation processes that would normally occur over years in real - world use. This helps in identifying potential failures, improving product design, and ensuring product quality and reliability.
Selecting the Right Temp Chamber
The first step in using a temp chamber for accelerated aging testing is to select the appropriate chamber for your specific needs. There are several factors to consider:
- Temperature Range: Different products require different temperature ranges for accelerated aging testing. For example, some electronic components may need to be tested at high temperatures up to 120°C or more, while food products may require lower temperature ranges for testing. Make sure the temp chamber you choose can achieve and maintain the desired temperature range accurately.
- Humidity Control: If your testing involves humidity, ensure that the temp chamber has reliable humidity control capabilities. Some chambers can maintain a relative humidity range from 10% to 98%, which is suitable for a wide variety of applications.
- Chamber Size: The size of the chamber should be large enough to accommodate your test samples without overcrowding. Overcrowding can affect the uniformity of temperature and humidity distribution inside the chamber, leading to inaccurate test results.
- Uniformity and Stability: Look for a temp chamber that offers high - level uniformity and stability of temperature and humidity. Uniformity refers to how evenly the temperature and humidity are distributed throughout the chamber, while stability refers to the ability of the chamber to maintain the set conditions over time.
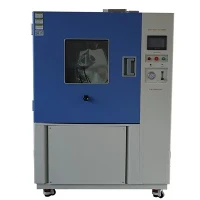
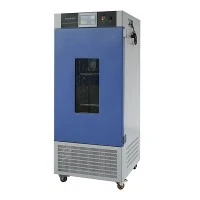
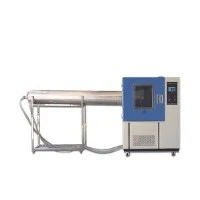
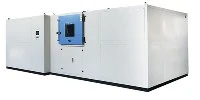
As a temp chamber supplier, we offer a wide range of temp chambers, including Industrial Furnace, Battery High Temperature Humidity Test Chamber, and Humidity And Temperature Chambers, which can meet different testing requirements.


Preparing the Test Samples
Once you have selected the appropriate temp chamber, the next step is to prepare the test samples. Here are some key points to keep in mind:
- Sample Selection: Select representative samples of your product for testing. The samples should be in the same condition as the products that will be used in the real world.
- Sample Mounting: Mount the test samples properly inside the temp chamber. Make sure they are not in contact with each other or with the chamber walls to ensure proper air circulation and accurate testing.
- Monitoring Devices: Install appropriate monitoring devices on the test samples, such as temperature sensors and humidity sensors, to record the environmental conditions during the test.
Setting Up the Temp Chamber
Before starting the accelerated aging test, you need to set up the temp chamber correctly:
- Power On and Pre - heat: Turn on the temp chamber and allow it to pre - heat to the desired temperature. This may take some time, depending on the chamber size and the set temperature.
- Set the Parameters: Set the temperature, humidity, and other environmental parameters according to your test requirements. Most modern temp chambers are equipped with digital controllers that allow you to set and adjust the parameters easily.
- Calibration: Regularly calibrate the temp chamber to ensure the accuracy of the temperature and humidity readings. Calibration should be carried out by a qualified technician using appropriate calibration equipment.
Conducting the Accelerated Aging Test
Once the temp chamber is set up and the test samples are prepared, you can start the accelerated aging test:
- Initial Inspection: Conduct an initial inspection of the test samples before placing them in the temp chamber. Record the initial appearance, dimensions, and other relevant properties of the samples.
- Start the Test: Place the test samples inside the temp chamber and start the test. Monitor the test process regularly to ensure that the chamber is operating properly and the environmental conditions are within the set range.
- Intermediate Inspections: Conduct intermediate inspections of the test samples at regular intervals during the test. Check for any signs of degradation, such as cracking, discoloration, or changes in mechanical properties.
- Test Duration: The test duration depends on the product and the test requirements. In general, accelerated aging tests can last from a few hours to several weeks or even months.
Analyzing the Test Results
After the accelerated aging test is completed, it's time to analyze the test results:
- Visual Inspection: Conduct a visual inspection of the test samples to check for any visible signs of degradation. Compare the final appearance of the samples with the initial appearance recorded before the test.
- Physical and Chemical Analysis: Perform physical and chemical analysis on the test samples to determine any changes in their properties. This may include measuring the hardness, strength, electrical conductivity, and other relevant properties of the samples.
- Failure Analysis: If any of the test samples fail during the test, conduct a failure analysis to determine the root cause of the failure. This information can be used to improve the product design and manufacturing process.
Post - test Maintenance of the Temp Chamber
After the test is completed, it's important to perform post - test maintenance on the temp chamber:
- Cleaning: Clean the temp chamber thoroughly to remove any residues or contaminants left by the test samples. Use a mild detergent and a soft cloth to clean the chamber interior.
- Inspection and Maintenance: Inspect the chamber components for any signs of wear or damage. Replace any worn - out parts and perform routine maintenance tasks, such as lubricating the moving parts and checking the electrical connections.
- Storage: If the temp chamber will not be used for a long time, store it in a dry and clean environment. Cover the chamber to protect it from dust and moisture.
Conclusion
Using a temp chamber for accelerated aging testing is a complex but essential process for ensuring the quality and reliability of products. By following the steps outlined above, you can effectively use a temp chamber to conduct accurate and meaningful accelerated aging tests. As a temp chamber supplier, we are committed to providing high - quality temp chambers and professional technical support to help you achieve your testing goals. If you are interested in purchasing a temp chamber or have any questions about accelerated aging testing, please feel free to contact us for further discussion and negotiation.
References
- ASTM International. (20XX). Standard practices for accelerated aging of plastics.
- ISO. (20XX). International standards for environmental testing of products.
- Manufacturer's manual of the temp chamber.