

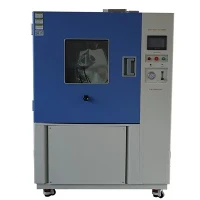
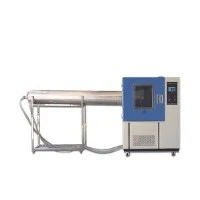
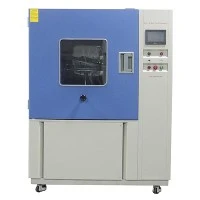

As a trusted supplier of IPX5 Testers, ensuring the reliable performance of our equipment is of utmost importance. In this blog post, I will share some essential steps and tips on how to check the performance of an IPX5 Tester to guarantee accurate and consistent testing results. Whether you are a manufacturer looking to test your products' waterproof capabilities or a quality control professional, these guidelines will help you maintain the optimal functioning of your IPX5 Tester.
1. Visual Inspection
The first step in checking the performance of an IPX5 Tester is to conduct a thorough visual inspection. Start by examining the exterior of the tester for any signs of damage, such as cracks, dents, or loose connections. Pay close attention to the hoses, nozzles, and valves, as these components are crucial for the proper delivery of water during the testing process.
Next, check the water tank or reservoir for any leaks or blockages. Ensure that the water level is sufficient and that the water is clean and free of debris. If the water appears dirty or contains sediment, it may affect the accuracy of the test results and could potentially damage the tester's internal components.
Inspect the control panel and display for any error messages or abnormal readings. Make sure that all the buttons, switches, and indicators are functioning correctly. If you notice any issues during the visual inspection, it is important to address them immediately to prevent further damage to the tester.
2. Calibration
Calibration is a critical step in ensuring the accuracy and reliability of an IPX5 Tester. Over time, the tester's components may wear out or become misaligned, which can lead to inaccurate test results. Therefore, it is recommended to calibrate the tester regularly, preferably at least once a year or as specified by the manufacturer.
To calibrate the IPX5 Tester, you will need to use a calibrated flow meter and pressure gauge. Follow the manufacturer's instructions carefully to ensure that the calibration process is done correctly. During calibration, measure the water flow rate and pressure at the nozzle to ensure that they are within the specified range for IPX5 testing.
If the flow rate or pressure is outside the acceptable range, adjust the tester's settings accordingly. Some IPX5 Testers may have built-in calibration functions that allow you to adjust the flow rate and pressure automatically. If your tester does not have this feature, you may need to make manual adjustments using the valves and regulators on the tester.
After calibration, conduct a test run to verify that the tester is functioning correctly. Use a test specimen with known waterproof properties to ensure that the test results are consistent with the expected values. If the test results are still inaccurate, it may be necessary to repeat the calibration process or seek professional assistance.
3. Water Distribution Test
The IPX5 Tester is designed to simulate the conditions of water being sprayed from a nozzle onto a test specimen. To ensure that the water is distributed evenly and accurately, it is important to conduct a water distribution test.
Start by placing a test specimen on the test platform of the IPX5 Tester. Make sure that the specimen is securely fastened and that it is positioned correctly according to the testing standards. Next, start the tester and set the appropriate test parameters, such as the water flow rate, pressure, and duration of the test.
As the water is sprayed onto the test specimen, observe the water distribution pattern. The water should be evenly distributed over the surface of the specimen, with no areas receiving an excessive amount of water or being missed altogether. If you notice any issues with the water distribution, such as uneven spraying or water pooling in certain areas, it may indicate a problem with the nozzle or the water delivery system.
To troubleshoot the water distribution issue, check the nozzle for any blockages or damage. Clean or replace the nozzle if necessary. Also, check the hoses and valves to ensure that they are not kinked or blocked. If the problem persists, it may be necessary to consult the manufacturer's technical support team for further assistance.
4. Leak Test
A leak test is an important step in ensuring the integrity of the IPX5 Tester. Leaks can not only affect the accuracy of the test results but also cause damage to the tester and the surrounding environment. Therefore, it is essential to check for leaks regularly.
To conduct a leak test, start by filling the water tank or reservoir with water. Make sure that the tank is filled to the recommended level. Next, turn on the tester and let it run for a few minutes to allow the water to circulate through the system.
Visually inspect the tester's hoses, connections, and valves for any signs of water leakage. Pay close attention to the areas where the hoses connect to the nozzles and the water tank. If you notice any drops of water or wet spots, it indicates a leak.
To repair a leak, first, turn off the tester and disconnect the power supply. Then, locate the source of the leak and tighten the connections or replace the damaged components. If the leak is coming from a hose, you may need to replace the hose with a new one.
After repairing the leak, conduct another leak test to ensure that the problem has been resolved. Repeat the process until no leaks are detected.
5. Functionality Test
In addition to the visual inspection, calibration, water distribution test, and leak test, it is also important to conduct a functionality test to ensure that the IPX5 Tester is operating correctly.
The functionality test involves checking all the features and functions of the tester to ensure that they are working as intended. This includes testing the control panel, the display, the water flow rate adjustment, the pressure control, and the timer.
To conduct the functionality test, refer to the manufacturer's user manual for the specific instructions. Follow the steps carefully and test each feature and function separately. If any of the features or functions are not working correctly, it may indicate a problem with the tester's software or hardware.
In this case, it is recommended to contact the manufacturer's technical support team for assistance. They will be able to diagnose the problem and provide the necessary repairs or replacements.


Conclusion
Checking the performance of an IPX5 Tester is essential to ensure accurate and reliable testing results. By following the steps outlined in this blog post, you can maintain the optimal functioning of your IPX5 Tester and ensure that it meets the highest standards of quality and performance.
If you are in the market for an IPX5 Tester or other IP testing equipment, we are a leading supplier that offers a wide range of high-quality testing solutions. Our products include the IPX5 IPX6 Rain Jet Test Chamber, IP Testing Machine Of IP 04 05 06, IP67 Test Chamber, IP54 Test Equipment, and Waterproof Water Ingress Test Chamber.
We are committed to providing our customers with the best products and services. If you have any questions or would like to learn more about our IPX5 Testers or other testing equipment, please do not hesitate to contact us for further discussion and potential procurement.
References
LIB Industry Technical Team – Technical information, product specifications, customization, and application guidance for rain testing equipment.
- Manufacturer's user manual for IPX5 Tester
- International Electrotechnical Commission (IEC) standards for IP testing